
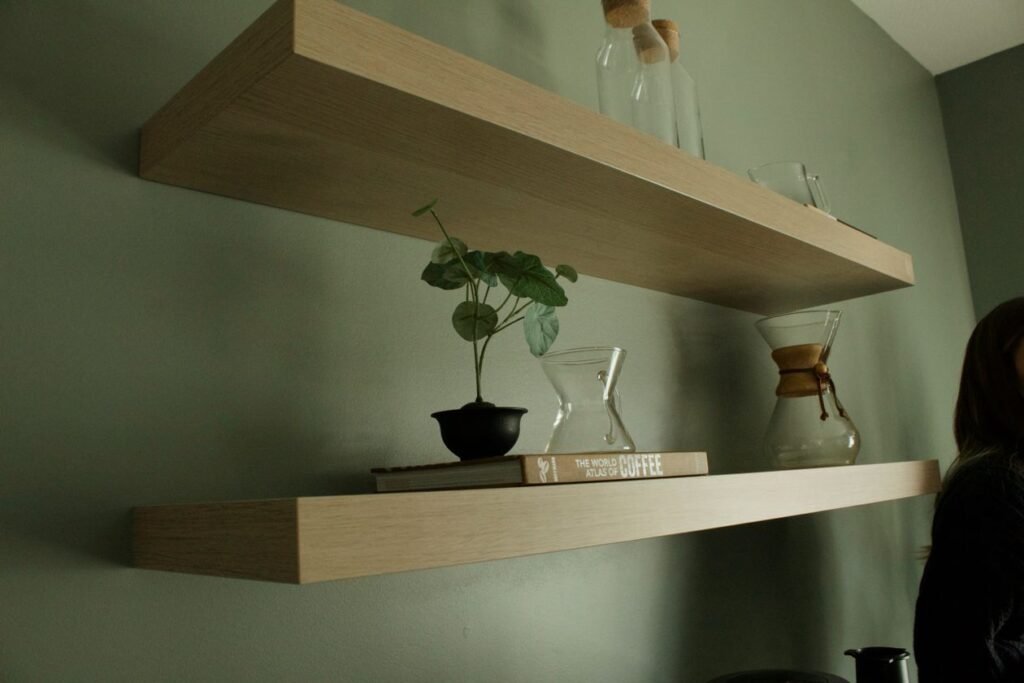
How to Build Floating Shelves That Are Level and Sturdy
Learning how to build floating shelves is a perfect weekend project for beginners. Floating shelves look clean and modern because the brackets are hidden inside the shelf, so there are no visible supports underneath. They are great for books, plants, photos, and kitchen storage, and they take up no floor space.
This guide shows you how to build floating shelves in a weekend, from measuring and finding studs to mounting the brackets level and styling the finished shelves. You need basic tools, one afternoon of work, and a little patience while the finish dries.
Before you start, decide what the shelves will hold. Books are heavy, plants are medium, and photos are light. The weight decides how long the shelves can be and how many brackets you need. A shelf that is too long for its brackets will sag, even if it looks fine on day one. Knowing the weight helps you decide how to build floating shelves that hold up.
Table of Contents
What You Will Need to Build Floating Shelves
- Wood boards for the shelves (pine or plywood, 1.5 inches thick is a good start)
- Hidden floating shelf brackets, sized to your shelf depth
- Screws and wall plugs rated for your wall type
- Cordless drill and drill bits
- Level, 24-inch or longer
- Stud finder
- Tape measure and pencil
- Sandpaper (120-grit, then 220-grit)
- Wood stain or paint, plus a brush or cloth
- Safety glasses and a dust mask
Tip: Buy brackets that are slightly shorter than your shelf depth, so the bracket does not poke out the front. A bracket that is 2 inches shorter than the shelf is a good rule for beginners. A bracket 2 inches shorter than the shelf is the safe rule when you learn how to build floating shelves.
Step 1: Measure and Plan Your Shelves
Measure the wall where the shelves will go, and mark the length you want. For a first project, keep shelves between 24 and 36 inches long. Longer shelves need more brackets and are harder to keep level. Planning the length is the first decision in how to build floating shelves that stay level.
Decide the height. In a living room, the first shelf is often at eye level, about 60 inches from the floor. In a kitchen, leave at least 18 inches above a counter so you can reach items easily. Mark the height lightly with a pencil, and step back to check it looks right before you drill.
Sketch the plan on paper: shelf length, height from the floor, and the gap between shelves if you are building more than one. A quick sketch saves mistakes later.
Step 2: Find the Studs
Floating shelves must be fixed into wall studs to hold weight safely. Drywall alone will not hold a loaded shelf, even with wall plugs. Fixing into studs is the most important safety rule in how to build floating shelves.
Use a stud finder and slide it slowly across the wall at shelf height. Mark each stud edge with a pencil, then mark the centre of each stud. Most studs in the USA are 16 inches apart, so once you find one, the next is usually 16 inches away.
If your shelf position does not line up with studs, move the shelf a few inches left or right until at least two brackets hit studs. Do not skip this step to keep a shelf in a perfect spot. A shelf that falls down is worse than a shelf that is two inches off-centre.
Step 3: Mark a Level Line
Hold the level against the wall at your marked height and draw a light, level pencil line where the top of the bracket will sit. Check the line twice. A shelf that is even slightly out of level is obvious once books are on it.
Mark the bracket holes on the line, centred on the studs you found. Double-check the distance between the bracket marks matches the distance between the holes in your brackets.

Step 4: Drill and Fix the Brackets
Drill pilot holes into the studs at your marks. Pilot holes stop the wood from splitting and make it easier to drive the screws straight. Pilot holes are a small step that makes how to build floating shelves much easier.
Fix the brackets to the wall with the screws supplied, using the drill on a low speed. Check the brackets with the level again after fixing them. If a bracket is not level, loosen the screws, adjust it, and tighten again. Do not move on until the brackets are level and firm. Pull each bracket gently to test it. It should not move at all.
Wear safety glasses while drilling, and keep the drill straight so the holes stay level.

Step 5: Prepare the Wood
Sand the shelf boards with 120-grit sandpaper, following the grain of the wood, then finish with 220-grit for a smooth surface. Wipe away the dust with a damp cloth and let the wood dry.
Apply wood stain or paint in thin, even coats, following the product instructions. Let each coat dry fully before adding the next. Two thin coats usually look better than one thick coat, and they dry faster.
If you are painting, prime the wood first so the paint sticks evenly and does not show the grain through.
Step 6: Slide the Shelves Onto the Brackets
Once the finish is fully dry, slide each shelf onto its brackets. The shelf should fit snugly, with no wobble. Most hidden brackets have a small screw underneath to lock the shelf in place. Tighten that screw gently so the shelf cannot slide off. A snug slide-on fit is the sign of success when you learn how to build floating shelves.
Check the shelf with the level one last time. If it is level, it is ready to style. If it is not, take the shelf off, check the brackets again, and adjust before you load it.
Step 7: Style and Load Your Shelves
Load heavy items, like books, close to the brackets and near the wall, not at the front edge. Put lighter items at the front. That placement is the golden rule when you learn how to build floating shelves.
Further reading: Family Handyman shares eight floating shelf ideas for styling your shelves.
Leave some empty space. A shelf that is packed edge to edge looks cluttered, even if everything on it is tidy. A good rule is to leave about one-third of the shelf empty.
In a kitchen, keep everyday items within easy reach and put display items higher. In a living room, mix books, a plant, and one decorative item per shelf for a calm, balanced look.
Troubleshooting: How to Build Floating Shelves That Stay Level
- Shelf is not level? The brackets were not level, or the wall is uneven. Take the shelf off, re-level the brackets, and check the wall with a longer level.
- Shelf sags in the middle? The shelf is too long for its brackets, or it is overloaded. Add a middle bracket, shorten the shelf, or move heavy books closer to the brackets.
- Shelf wobbles? The locking screw underneath is loose, or the bracket is not fixed into a stud. Tighten the screw, and check that every bracket is screwed into a stud.
- Finish looks patchy? The wood was not sanded evenly, or the coats were too thick. Sand it back lightly, wipe off the dust, and apply thin coats again.
When to Call a Professional Instead
Call a professional if the wall is plaster, brick, or tile and you are unsure how to fix into it, if you need to hang very heavy items like a large TV, or if you find wiring or plumbing behind the wall. Stop and call a professional if a stud finder gives unclear readings or the wall feels soft or damaged.
How to Build Floating Shelves: Final Checklist
- Measure first, and keep first shelves 24 to 36 inches long.
- Fix every bracket into a wall stud, and check it is level.
- Sand smooth, and apply thin coats of stain or paint.
- Slide the shelf on snugly, lock it, and check it is level again.
- Load heavy items near the wall, and leave space empty.
Building floating shelves yourself costs far less than buying ready-made shelves, and in most homes it takes one weekend afternoon plus drying time. Once you know how to build floating shelves, the same brackets and steps work for the next room too.
Frequently Asked Questions
How long does it take to build floating shelves?
Usually 2 to 4 hours of active work for two shelves, plus drying time for stain or paint. Plan it as a weekend project, not a one-hour job. Once you know how to build floating shelves, the second pair goes up faster.
How much weight can floating shelves hold?
It depends on the brackets, the shelf length, and whether the brackets are fixed into studs. Fix into studs for heavy loads like books, and always follow the bracket manufacturer’s weight limit when you learn how to build floating shelves.
Can I build floating shelves as a beginner?
Yes. This is a good first woodworking project if you measure carefully, find the studs, and check the level at every step. Keep the shelves short for your first try, and it will show you how to build floating shelves with basic tools only.
What wood should I use for floating shelves?
Pine is a good, affordable choice for beginners, and plywood with a finished edge also works well. Choose boards that are straight, with no warp or twist, and at least 1.5 inches thick for a sturdy look — that is the easiest way to learn how to build floating shelves.
Pingback: 20 Genius Kitchen Organization Hacks That Actually Work